Grilling Pizza Made Easy: A Beginner’s Guide
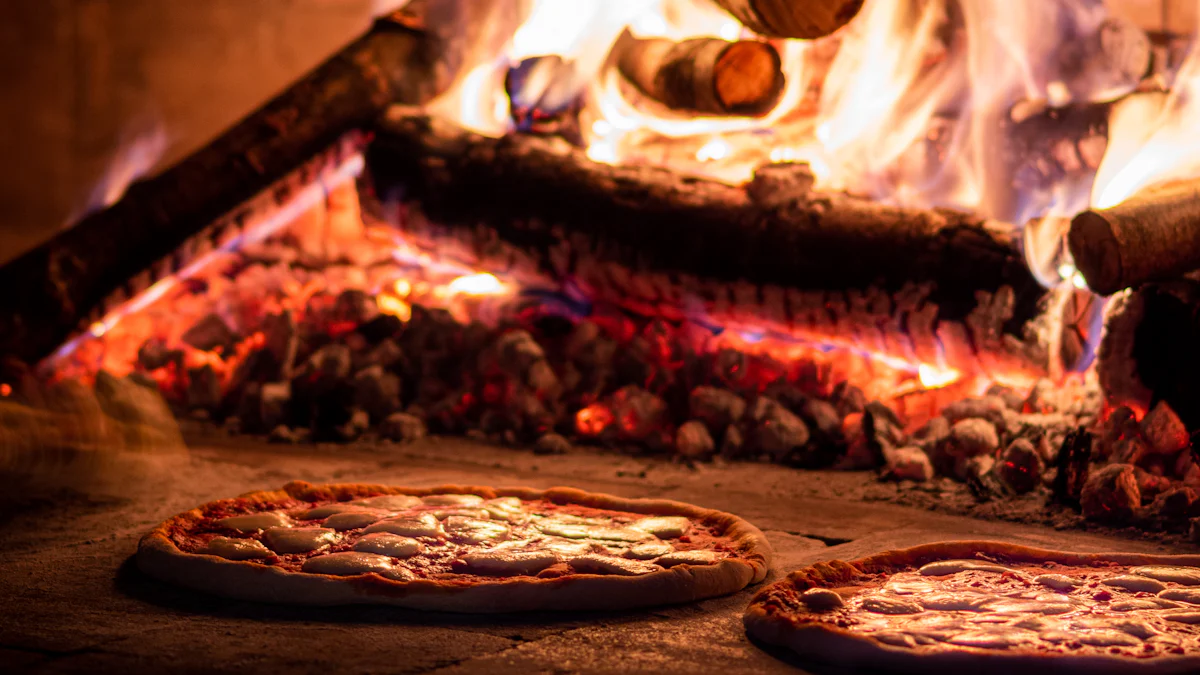
Grilling pizza is a game-changer for any pizza enthusiast. The intense heat of the grill delivers a crust that’s irresistibly crisp on the outside while remaining soft and airy inside. Incorporating a pizza oven for grill setups, such as a charcoal pizza oven or a mobile pizza oven, enhances the experience by infusing a rich, smoky flavor that’s nearly impossible to achieve with a standard oven. It’s incredibly easy to turn your backyard into a pizzeria with these tools. Whether you’re crafting individual pizzas or serving up a large one to share, grilling pizza with the right equipment brings unmatched fun and flavor to your table.
Key Takeaways
Preheat your grill or pizza oven for at least 15-20 minutes to achieve a crispy crust and evenly cooked pizza.
Use a pizza stone or steel to mimic the effects of a traditional brick oven, ensuring even heat distribution and preventing soggy crusts.
Master the two-part cooking method: grill one side of the dough first, then flip it, add toppings, and finish cooking for optimal results.
Keep toppings light and avoid overloading your pizza to ensure even cooking and a perfect texture.
Experiment with different dough types and toppings to create unique flavor combinations that elevate your grilled pizza experience.
Monitor your pizza closely while grilling, as it cooks quickly—check for bubbling cheese and a golden crust to know when it's done.
Incorporate wood chunks for a smoky flavor that enhances the taste of your grilled pizza, making it reminiscent of a wood-fired oven.
Preparing the Pizza Oven for Grill
Grilling pizza starts with setting up your pizza oven properly. A well-prepared oven ensures your pizza cooks evenly and achieves that perfect balance of crispy crust and airy interior. Let’s dive into the steps to get your pizza oven ready for action.
Preheating the Oven
Preheating is essential when grilling pizza. It helps create the high heat needed for a crisp crust and evenly cooked toppings. Start by lighting your grill or pizza oven and letting it heat up for about 15-20 minutes. If you’re using a wood-fired or charcoal pizza oven, make sure the flames are steady and the coals are glowing red. For gas-powered ovens, set the burners to high and close the lid to trap the heat.
A pizza stone can be a game-changer here. Place it in the oven during preheating to mimic the effect of a traditional brick oven. The stone absorbs and retains heat, ensuring your pizza cooks evenly from the bottom up. Remember, a properly preheated oven is the first step to achieving restaurant-quality results.
Achieving the Right Temperature
The grill temperature plays a crucial role in grilling pizza. Aim for at least 550°F to replicate the intense heat of professional pizza ovens. Use a thermometer to check the temperature inside your grill or pizza oven. If you’re using a wood-fired oven, adjust the wood or coals to maintain consistent heat. For gas ovens, tweak the burner settings as needed.
High temperatures cook pizza quickly, often in just a few minutes. This rapid cooking locks in flavors and creates that signature charred crust. Keep an eye on the temperature throughout the process to avoid undercooking or burning your pizza.
Essential Tools for Grilling Pizza
Having the right tools makes grilling pizza much easier. Here’s a quick list of essentials:
Pizza Peel: This flat, paddle-like tool helps you slide pizzas in and out of the oven without disturbing the toppings.
Pizza Stone or Steel: These surfaces distribute heat evenly and prevent soggy crusts.
Thermometer: A grill-safe thermometer ensures you maintain the ideal temperature.
Tongs or Spatula: These help you adjust the pizza or rotate it for even cooking.
Brush: Use a brush to clean the grill grates or spread oil to prevent sticking.
Investing in quality tools enhances your grilling experience and ensures consistent results. Some pizza ovens even come with accessories like peels and stones, making them a great all-in-one option for beginners.
“Grilling pizza is best!” The high heat of a grill delivers a crispy crust and those delightful charred spots you’d find in a pizzeria. With the right preparation, you can recreate this magic at home.
Preparing the Dough and Ingredients for Pizza
The foundation of any great pizza lies in its dough and toppings. Preparing these elements with care ensures your grilled pizza turns out flavorful, crispy, and satisfying. Let’s break it down step by step.
Choosing or Making the Dough
The dough is the heart of your pizza. You can either make your own or buy pre-made dough from the store. If you’re feeling adventurous, try making a batch of neapolitan pizza dough. It’s known for its soft, airy texture and slightly chewy bite, which pairs perfectly with the high heat of a grill.
Homemade dough gives you control over the flavor and texture. A fail-proof recipe often includes simple ingredients like flour, water, yeast, salt, and olive oil. Knead it until smooth, let it rise, and you’re ready to go. Store-bought dough works too, especially if you’re short on time. Just make sure it’s fresh and pliable.
Pro Tip: Divide your dough into smaller portions for individual pizzas. This makes grilling easier and allows everyone to customize their toppings.
Layering Ingredients for the Best Results
When it comes to toppings, less is more. Overloading your pizza can lead to uneven cooking and a soggy crust. Start with a thin layer of sauce—whether it’s classic tomato, pesto, or even a white sauce. Spread it evenly, leaving a small border around the edges for that perfect crust.
Next, add your cheese. Mozzarella is a classic choice, but feel free to experiment with others like provolone, gouda, or even goat cheese. After that, layer your toppings sparingly. Fresh vegetables, cured meats, and herbs work beautifully. Remember, the grill’s high heat will intensify the flavors, so a little goes a long way.
Quick Tip: Pre-cook toppings like sausage or mushrooms that release moisture. This prevents your pizza from becoming soggy during grilling.
Preventing Sticking During Grilling
Nothing ruins a pizza-making session faster than dough sticking to the grill. To avoid this, start by lightly oiling your grill grates or pizza stone. Use a high-smoke-point oil like canola or avocado oil for the best results. If you’re using a pizza peel, dust it with flour or cornmeal before placing the dough on it. This helps the dough slide off smoothly onto the grill.
Grill one side of the dough first before adding toppings. This step creates a firm base, prevents sogginess, and ensures even cooking. Once the first side is done, flip the dough, quickly add your sauce and toppings, and let the grill work its magic.
Pro Tip: Keep your tools handy. A spatula or tongs can help you adjust the dough without tearing it.
With these steps, you’ll have a perfectly prepared base and toppings for your grilled pizza. Now, you’re ready to move on to the fun part—grilling!
Grilling Techniques for Perfect Pizza
Grilling pizza is where the magic happens. This step transforms your prepared dough and toppings into a delicious masterpiece. With the right techniques, you’ll achieve a crispy crust, perfectly melted cheese, and toppings bursting with flavor. Let’s explore how to master this process.
Placing the Pizza in the Oven
Getting your pizza onto the grill or into the pizza oven can feel tricky, but it’s easier with a little preparation. Before you start, make sure everything is ready—this includes your dough, sauce, toppings, and tools. As BBQ Champs advises, using the “mise en place” technique ensures you’re not scrambling for ingredients while the grill is hot.
If you’re using a pizza peel, dust it with flour or cornmeal to prevent sticking. Gently slide the pizza onto the preheated pizza stone or directly onto the grill grates. If you’re grilling directly on the grates, place the dough carefully to avoid tearing. For beginners, a pizza stone or steel can make this step much smoother by providing a stable surface.
Pro Tip: Keep the grill lid closed after placing the pizza. This traps the heat and helps cook the toppings evenly while crisping the crust.
Monitoring and Adjusting Cooking
Grilled pizza cooks quickly, so you’ll need to stay attentive. The high heat of the grill can turn a perfect pizza into a burnt one in seconds. Check the pizza frequently, especially after the first minute. Look for bubbling cheese and a golden crust as signs of progress.
Use tongs or a spatula to rotate the pizza halfway through cooking. This ensures even heat distribution and prevents one side from overcooking. If you notice the crust browning too quickly, lower the heat slightly or move the pizza to a cooler part of the grill.
Quick Tip: Keep a timer handy. Most grilled pizzas cook in 3-5 minutes, depending on the grill’s temperature.
Using a Two-Part Cooking Method
The two-part cooking method is a game-changer for grilled pizza. Start by grilling one side of the dough first. This creates a firm base that won’t get soggy when you add toppings. Once the first side is golden and slightly charred, flip the dough using tongs or a spatula.
After flipping, work quickly to add your sauce, cheese, and toppings. The residual heat from the grill will melt the cheese and cook the toppings in no time. Close the lid to help the heat circulate and finish cooking the pizza evenly.
This method not only prevents sticking but also ensures a crisp crust and perfectly cooked toppings. It’s especially helpful for beginners who want consistent results.
Pro Tip: Avoid overloading the pizza with toppings during this step. A lighter load cooks faster and delivers better texture.
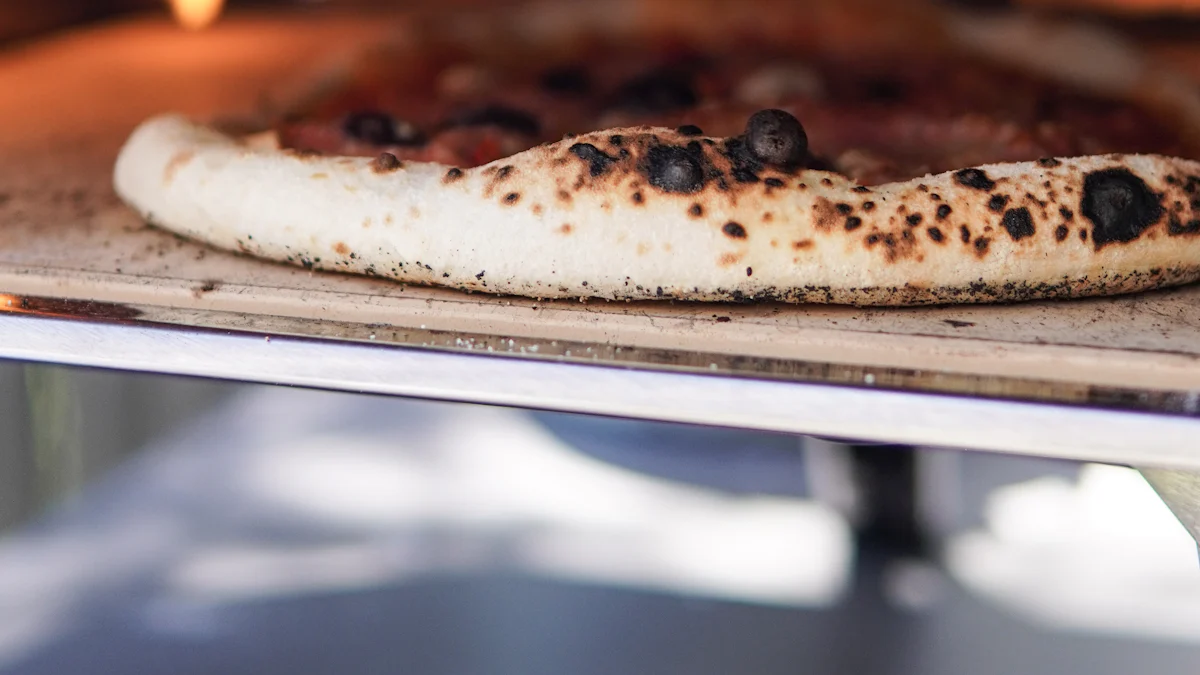
By following these techniques, you’ll create grilled pizzas that rival those from a wood-fired oven. The combination of high heat, careful monitoring, and smart cooking methods guarantees success every time.
Enhancing Pizza Flavor on the Grill
Grilling pizza isn’t just about cooking—it’s about creating flavors that stand out. The grill’s high heat and unique cooking environment allow you to experiment and elevate your pizza game. Let’s explore how you can enhance the flavor of your grilled pizza and make it unforgettable.
Adding Wood Chunks for Smoky Flavor
One of the best ways to take your grilled pizza to the next level is by adding wood chunks to your grill. This simple step infuses your pizza with a smoky flavor that’s reminiscent of a wood-fired pizza. The aroma and taste of the smoke blend beautifully with the toppings, giving your pizza a rich, complex profile.
To get started, choose hardwood chunks like oak, hickory, or cherry. These woods burn slowly and produce a steady, flavorful smoke. Soak the chunks in water for about 30 minutes before placing them on the hot coals or in a smoker box for gas grills. As the wood smolders, it releases smoke that permeates the pizza, enhancing its taste.
Pro Tip: Use fruitwood like apple or cherry for a subtle sweetness, or hickory for a bold, robust flavor. Experiment with different woods to find your favorite combination.
The smoky flavor from the wood chunks sets grilled pizza apart from traditional oven-baked pizza. It’s a flavor you simply can’t achieve in a standard home oven. This small addition transforms your backyard pizza night into a gourmet experience.
Experimenting with Toppings and Dough
Grilling pizza gives you the freedom to get creative with your toppings and dough. The intense heat of the grill caramelizes ingredients and brings out their natural sweetness, making every bite more flavorful. This is your chance to think outside the box and try combinations you wouldn’t normally consider.
Start with the dough. While classic pizza dough works great, you can experiment with alternatives like whole wheat, sourdough, or even gluten-free options. Each type of dough reacts differently to the grill’s heat, offering unique textures and flavors. For example, sourdough adds a tangy note that pairs wonderfully with smoky toppings.
When it comes to toppings, simplicity often works best. The grill’s high heat intensifies flavors, so a few well-chosen ingredients can go a long way. Try fresh vegetables like bell peppers, onions, or zucchini. Add proteins like grilled chicken, shrimp, or prosciutto. Don’t forget fresh herbs like basil or arugula for a burst of freshness.
Quick Tip: Use soft cheeses like mozzarella for the best results. They melt quickly and evenly, creating that gooey, irresistible layer we all love.
Grilled pizza also allows you to play with unconventional toppings. Think figs with goat cheese, barbecue sauce with pulled pork, or even a breakfast pizza with eggs and bacon. The possibilities are endless, and the grill’s high heat ensures everything cooks to perfection.
By experimenting with toppings and dough, you’ll discover combinations that make your grilled pizza truly one-of-a-kind. The grill’s ability to create a crispy crust, charred spots, and smoky undertones gives you an edge that traditional oven-baked pizza can’t match.
Troubleshooting and Tips for Grilling Pizza
Grilling pizza can feel intimidating at first, but with a little practice and the right guidance, you’ll be creating masterpieces in no time. Let’s tackle some common challenges and share expert tips to ensure your pizza turns out perfect every time.
Avoiding Common Beginner Mistakes
Even seasoned cooks can stumble when grilling pizza, so don’t worry if things don’t go perfectly the first time. Here are some common pitfalls and how to avoid them:
Dough Sticking to the Grill: Sticky dough is a frequent issue for beginners. To prevent this, lightly oil your grill grates or pizza stone before cooking. If you’re using a pizza peel, dust it with cornmeal or flour to help the dough slide off smoothly. Always preheat your grill or stone thoroughly—this step is crucial for avoiding sticking.
Uneven Cooking: Hot spots on your grill can cause uneven cooking. Keep an eye on your pizza and rotate it halfway through cooking to ensure all sides cook evenly. If one side is browning too quickly, move the pizza to a cooler part of the grill.
Burnt Crust or Toppings: High heat is essential for grilling pizza, but it can also lead to burnt crusts or toppings if you’re not careful. Monitor your pizza closely, especially during the last minute of cooking. Use a timer and check every 30 seconds to avoid overcooking.
Overloading with Toppings: Too many toppings can make your pizza soggy and difficult to cook evenly. Stick to a few well-chosen ingredients and spread them sparingly. Pre-cook any toppings that release moisture, like mushrooms or sausage, to keep your crust crisp.
Pro Tip: If your pizza dough tears while transferring it to the grill, don’t panic. Patch it up quickly by pinching the dough together, and continue grilling. The high heat will seal the tear as it cooks.
Pro Tips for Consistent Success
Once you’ve mastered the basics, these tips will help you elevate your pizza game and achieve consistent results:
Preheat Like a Pro: Always preheat your grill or pizza stone for at least 20-30 minutes. A hot surface ensures a crispy crust and evenly cooked pizza. Aim for a grill temperature of 500-550°F for the best results.
Use a Pizza Stone or Steel: These tools distribute heat evenly and mimic the effects of a traditional brick oven. Place the stone or steel on the grill during preheating to ensure it’s hot enough when you start cooking.
Master the Two-Part Cooking Method: Grill one side of the dough first to create a firm base. Flip the dough, add your sauce and toppings, and finish cooking. This method prevents sogginess and ensures a crisp, golden crust.
Experiment with Dough and Toppings: Don’t be afraid to try new combinations. Whole wheat or sourdough doughs offer unique flavors, while unconventional toppings like figs, arugula, or barbecue chicken can make your pizza stand out.
Keep Your Tools Handy: A pizza peel, tongs, and a spatula are essential for smooth grilling. Use the peel to transfer the pizza, tongs to rotate it, and a spatula to remove it from the grill.
Add Fresh Herbs After Cooking: Ingredients like basil or arugula wilt quickly under high heat. Add them after grilling for a burst of fresh flavor.
Quick Tip: If you’re using a wood-fired grill, toss in some hardwood chunks like cherry or hickory for a smoky flavor that elevates your pizza to gourmet status.
Grilling pizza is a skill that improves with practice. Each attempt teaches you something new, whether it’s how to manage heat or which toppings work best. With these tips, you’ll soon be grilling pizzas that rival those from your favorite pizzeria.
Grilling pizza with a pizza oven for grill setups transforms your cooking experience into something extraordinary. This guide equips you with the steps to create pizzas that rival those from a brick-fired oven. The high heat of the grill delivers a crisp crust and perfectly cooked toppings, creating an optimal pizza environment right in your backyard. Don’t hesitate to experiment with flavors, toppings, and techniques. Each attempt brings you closer to mastering the art of grilled pizza. With practice, you’ll craft restaurant-quality creations that are both fun to make and delicious to enjoy.
FAQ
Can you grill pizza on a charcoal or gas grill?
Absolutely! Grilling pizza works wonderfully on both charcoal and gas grills. For charcoal grills, stretch your pizza dough on parchment paper and use it to flip the dough onto the prepped grill. On gas grills, preheat the grill to high heat and place the dough directly on the grates or on a pizza stone for even cooking. Both methods deliver a crispy crust and smoky flavor that’s hard to beat.
What’s the best way to prevent pizza from sticking to the grill?
Sticking dough can be frustrating, but it’s easy to avoid with a few tricks. Lightly oil your grill grates or pizza stone before cooking. If you’re using a pizza peel, dust it with flour or cornmeal to help the dough slide off smoothly. Another tip is to grill one side of the dough first, flip it, and then add your toppings. This creates a firm base and prevents sticking.
How do you achieve a crispy crust and melted cheese?
The secret lies in keeping the grill lid closed while cooking. Closing the lid traps the heat, allowing the cheese to melt evenly and the crust to crisp up beautifully. If you’re using a pizza stone, it helps distribute heat evenly, ensuring the bottom of the crust gets that perfect golden texture.
What’s the key to grilling pizza successfully?
The key is mastering the two-part cooking method. Start by grilling the dough without toppings for a few minutes. Flip it, add your sauce, cheese, and toppings, and return it to the grill. This technique ensures the crust stays crisp while the toppings cook evenly. It’s a foolproof way to get great results every time.
Do you need a pizza stone to grill pizza?
While a pizza stone isn’t mandatory, it’s highly recommended. A pizza stone absorbs and retains heat, mimicking the effects of a traditional brick oven. It ensures even cooking and prevents soggy crusts. If you don’t have one, you can grill directly on the grates, but a pizza stone makes the process much easier and more consistent.
How do you know when the pizza is done?
Grilled pizza cooks quickly, often in just 3-5 minutes. Look for bubbling cheese and a golden crust as signs it’s ready. Use tongs to lift the edge of the pizza and check the bottom for grill marks. If the crust is golden and the toppings are cooked, your pizza is good to go!
Can you experiment with different types of dough on the grill?
Yes, experimenting with dough is part of the fun! Classic pizza dough works great, but you can also try whole wheat, sourdough, or gluten-free options. Each type reacts differently to the grill’s heat, offering unique textures and flavors. Sourdough, for example, adds a tangy twist that pairs beautifully with smoky toppings.
What should you do if your pizza cooks too fast?
If your pizza is cooking too quickly, move it to a cooler part of the grill. Lower the heat slightly or adjust the placement of your pizza stone. Keep a close eye on it and rotate the pizza halfway through cooking to ensure even heat distribution. Quick adjustments can save your pizza from burning.
Is it possible to grill pizza directly on the grates?
Yes, you can grill pizza directly on the grates of both gas and charcoal grills. The technique is simple: place the dough carefully on the preheated grates and let it cook for a few minutes. Flip it, add your toppings, and finish grilling. Direct grilling gives the crust those beautiful charred spots and a smoky flavor.
What are some tips for beginners grilling pizza?
For beginners, preparation is key. Preheat your grill or pizza stone thoroughly, aim for a temperature of 500-550°F, and keep your tools handy. Use the two-part cooking method to avoid soggy crusts. Start with simple toppings and experiment as you gain confidence. Remember, practice makes perfect, so don’t be afraid to try again if your first attempt isn’t flawless.
See Also
Creating Your Own Brick Pizza Oven For Home Use
Compact Pizza Oven For Ideal Home Baking
2025 Reviews of Innovative Pizza Oven Air Fryers